DocsSetup
Google Workspace
A mail route, a content compliance rule and the SMTP relay service in the Google Admin console, then a DNS record.
Updated August 29, 2026
This guide connects a Google Workspace organization to RubySig. It has the same shape as the Microsoft 365 setup — send outbound mail to RubySig, let RubySig hand it back, never loop — using Google's building blocks.
You will configure, in this order:
- A mail route to your RubySig relay address.
- A content compliance rule that sends unstamped outbound mail down that route.
- The SMTP relay service, so RubySig can hand stamped mail back to Google for delivery.
- One DNS record for DKIM.
Everything is under Apps → Google Workspace → Gmail in the Admin console at admin.google.com, signed in as a Super Admin. Have your relay address from the portal's Setup page ready; it is written as <tenant>.smtp.rubysig.com throughout.
Caution: Do not configure Gmail's Outbound gateway setting for RubySig. It applies to every outbound message, including the ones RubySig has already handed back, and creates a loop that Google stops only after dozens of hops. The content compliance rule below is the correct mechanism, because it can exempt stamped mail.
Step 1 — Add the mail route
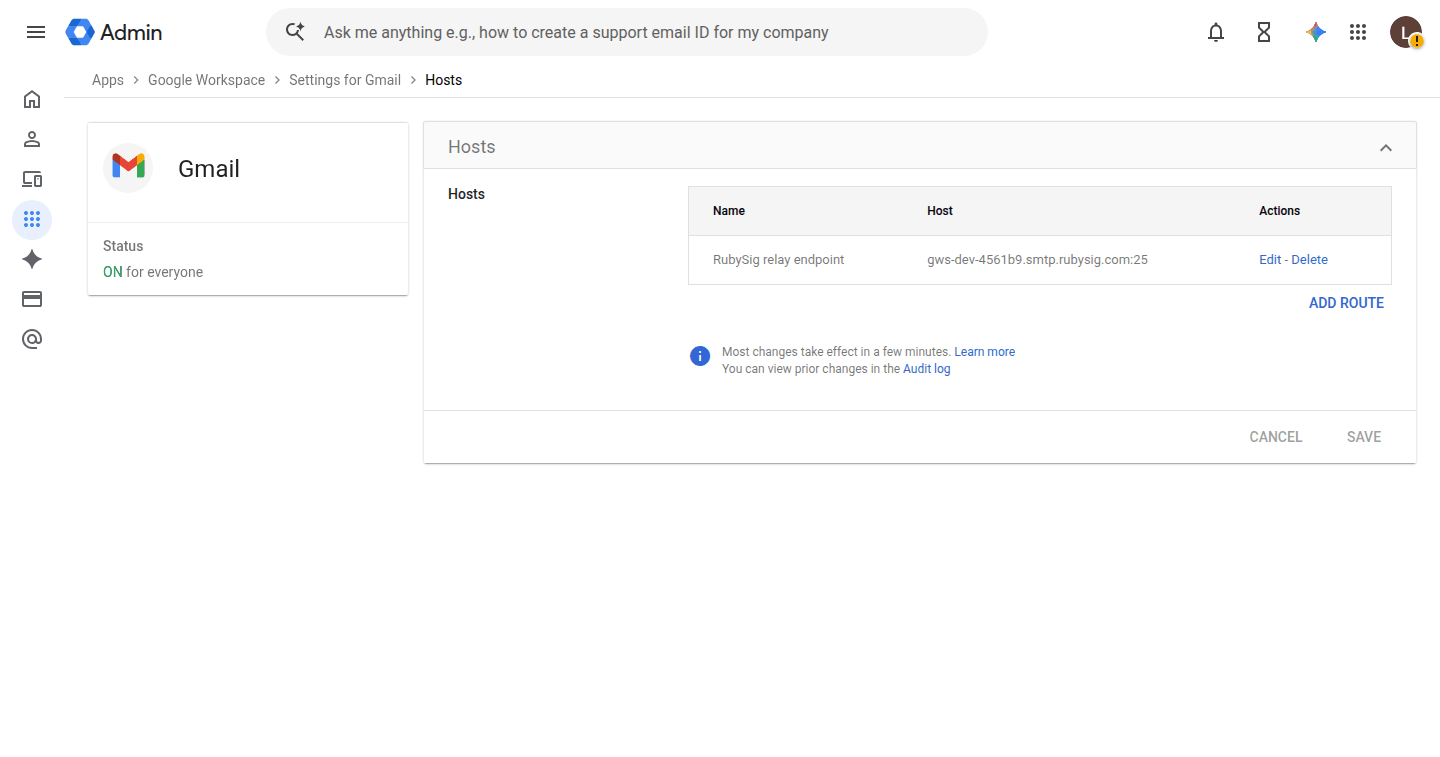
Open Apps → Google Workspace → Gmail → Hosts and choose Add route.
Fill in the dialog:
| Field | Value |
|---|---|
| Name | RubySig relay endpoint |
| Specify email server | Single host, <tenant>.smtp.rubysig.com, port 25 |
| Perform MX lookup on host | off |
| Require mail to be transmitted via a secure (TLS) connection | on |
| Require CA signed certificate | on |
| Validate certificate hostname | on |
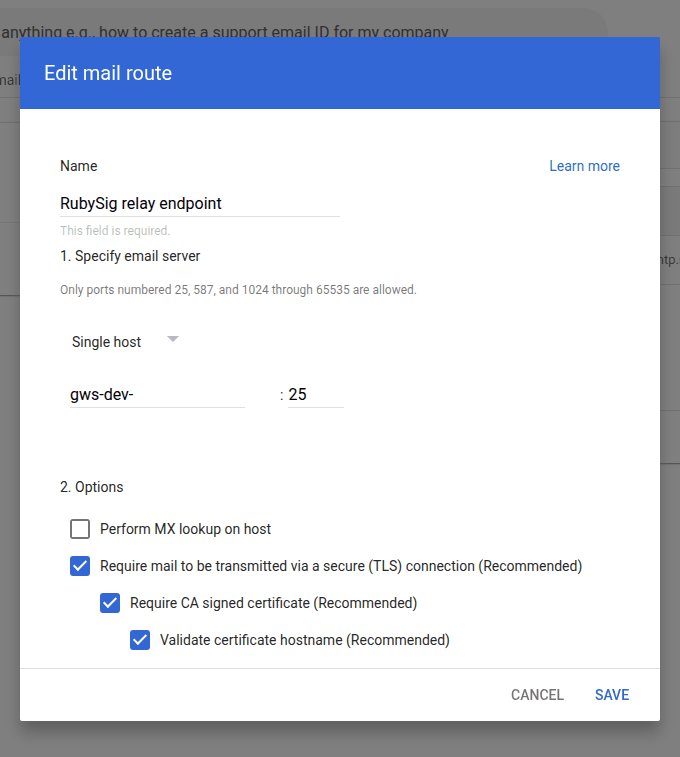
Click Save.
Tip: The Admin console sometimes shows a stale summary in the Hosts list immediately after saving. Open the route again to confirm the values before moving on — the reopened dialog is the truth.
Step 2 — Route unstamped outbound mail
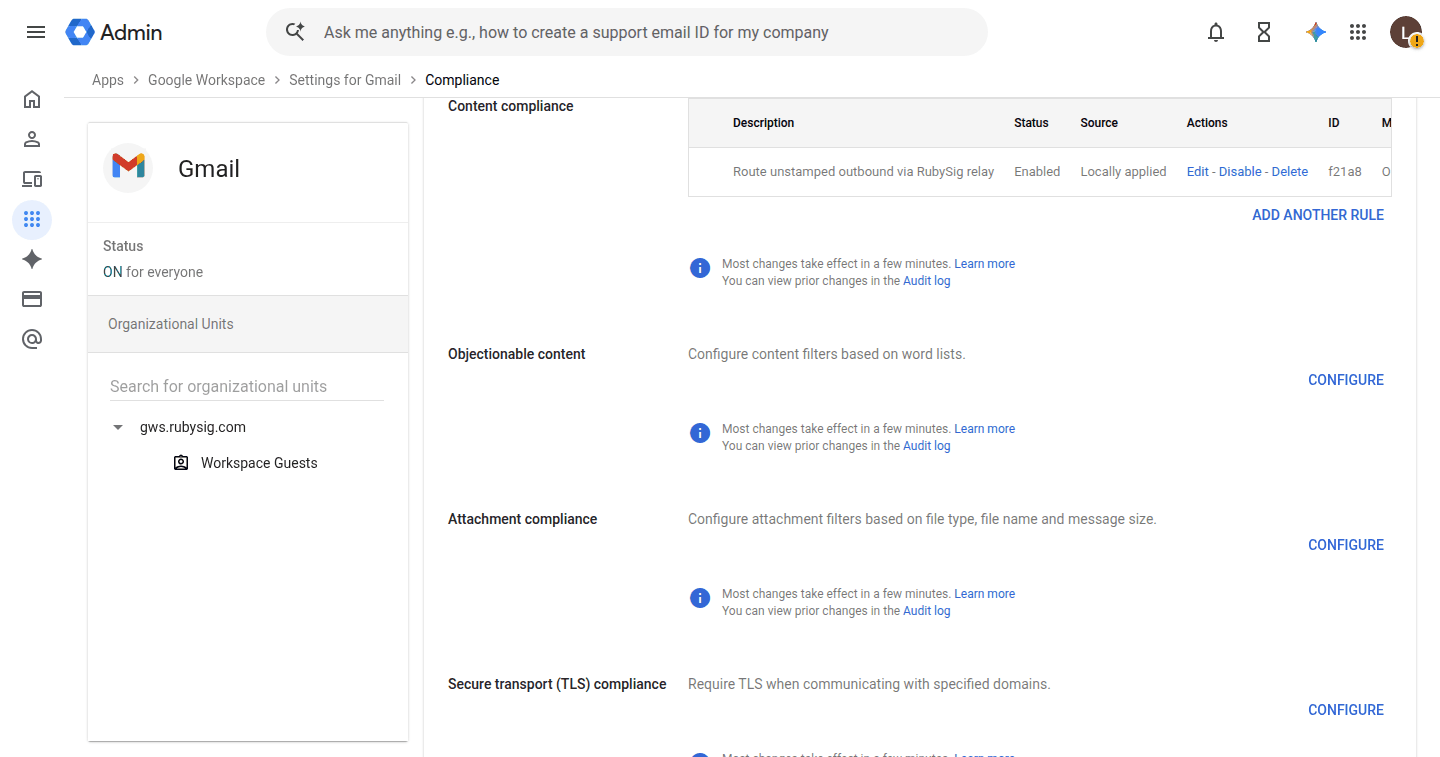
Open Apps → Google Workspace → Gmail → Compliance and, under Content compliance, choose Configure (or Add another rule if you already have one).
Messages to affect and the expression
Name the rule Route unstamped outbound via RubySig relay. Under Email messages to affect tick Outbound only. Under Add expressions, leave If ANY of the following match the message and add one expression:
| Setting | Value |
|---|---|
| Expression type | Simple content match |
| Location | Full headers |
| Match type | Not contains text |
| Content | X-RubySig-Stamped |
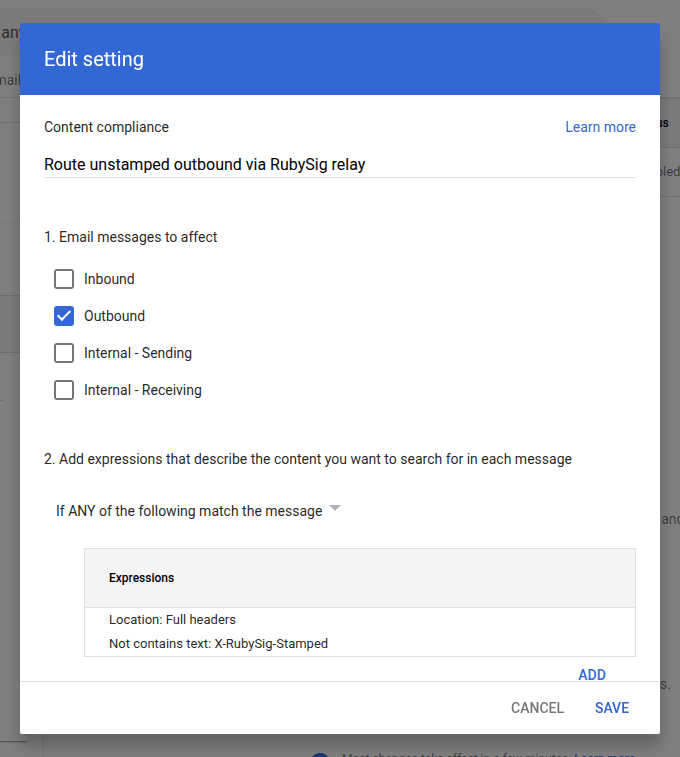
This is the most important line in this guide. RubySig adds the header X-RubySig-Stamped: yes to every message it hands back. The rule matches only messages that lack it, so a message goes to RubySig once and never again.
Caution: Type the header name exactly, once. A doubled or misspelled value here means stamped mail still matches the rule and loops. If you paste, check the saved expression by reopening the rule.
The action
Under If the above expressions match, do the following, choose Modify message. Under Route, tick Change route and select the host you created in Step 1 — RubySig relay endpoint. Leave every other option unticked.
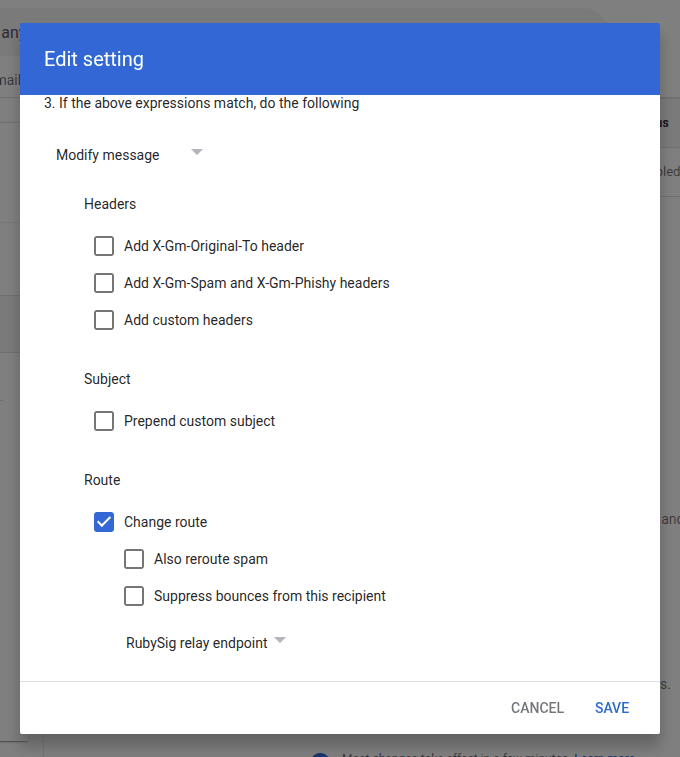
Click Save. The rule appears in the list as Enabled.
Step 3 — Let RubySig hand mail back
RubySig returns the stamped message to Google through the SMTP relay service, which then delivers it from Google's infrastructure. Open Apps → Google Workspace → Gmail → Routing and, under SMTP relay service, choose Configure (or Add another rule).
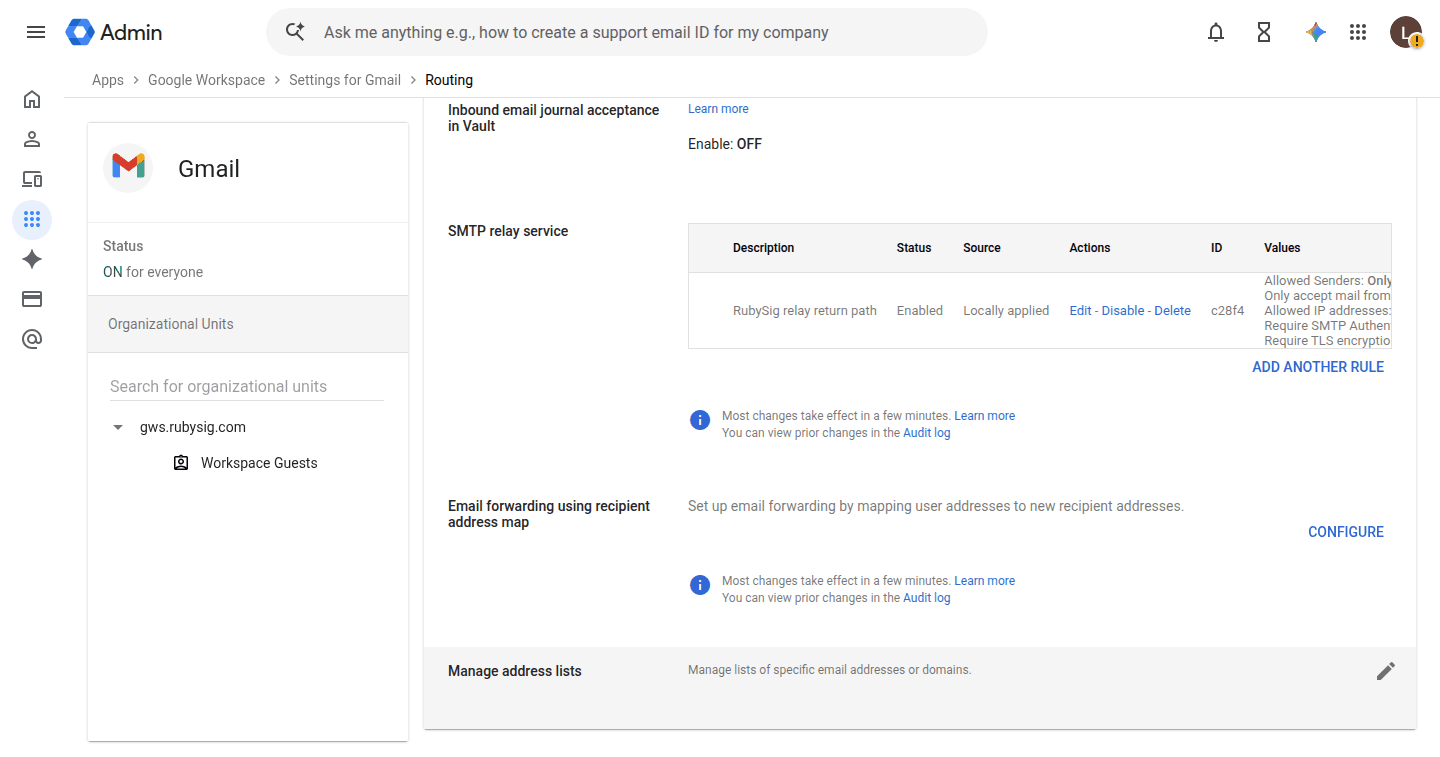
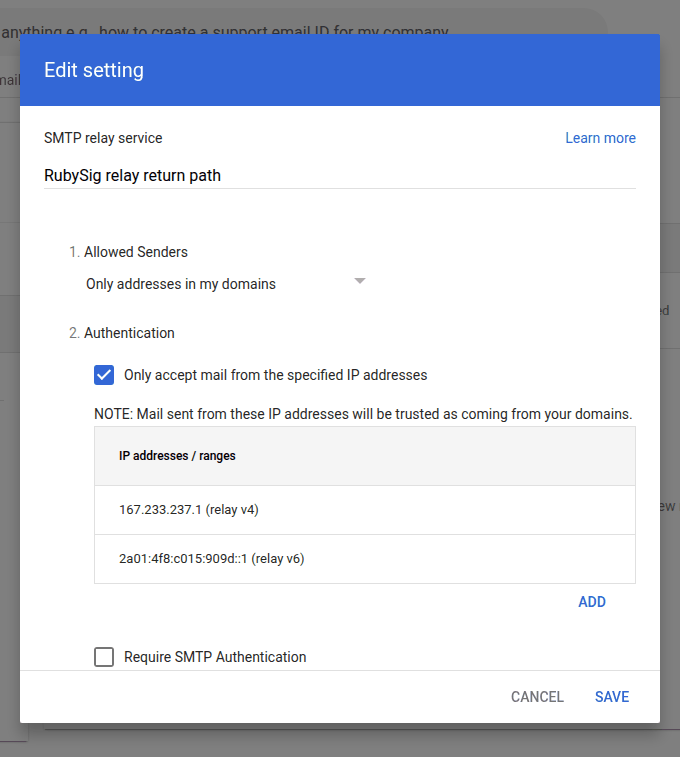
Fill in the rule:
| Setting | Value |
|---|---|
| Name | RubySig relay return path |
| Allowed senders | Only addresses in my domains |
| Only accept mail from the specified IP addresses | on, with 167.233.237.1 and 2a01:4f8:c015:909d::1 |
| Require SMTP Authentication | off |
| Require TLS encryption | on |
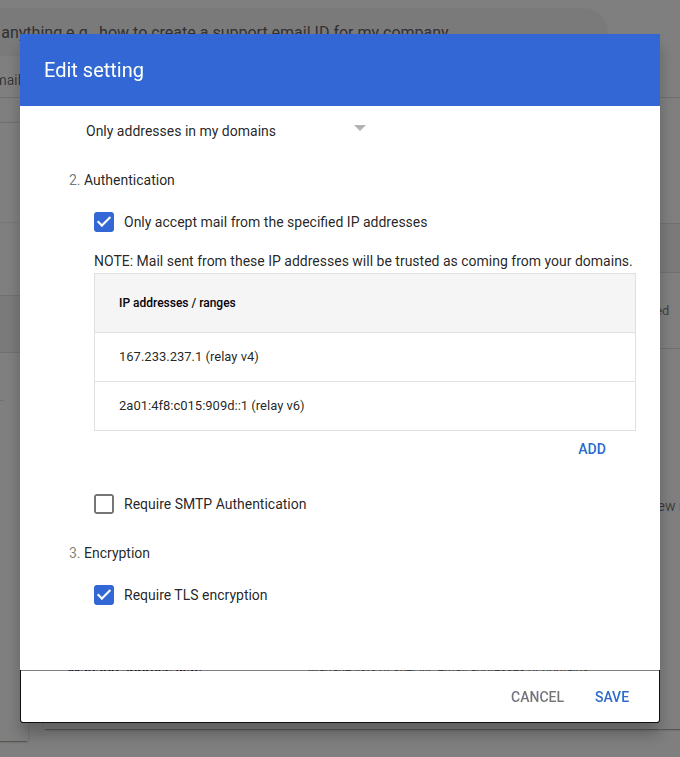
Click Save.
Step 4 — DNS
RubySig signs your mail with a DKIM key for your domain; publish its public half as one TXT record. The exact name and value are on the portal's Setup page, explained in DKIM.
| Type | Name | Value |
|---|---|---|
| TXT | rubysig1._domainkey |
(from Portal → Setup) |
Optionally add the relay's addresses to your SPF record; see SPF & DMARC. Your existing include:_spf.google.com stays.
Step 5 — Send a test message
Send a message from a Workspace mailbox to an external address you control. Then open Reporting → Email Log Search in the Admin console, find the message, and expand the recipient. You should see the content compliance rule in Matched rules, delivery to an SMTP server (RubySig), and then final delivery — all within seconds.
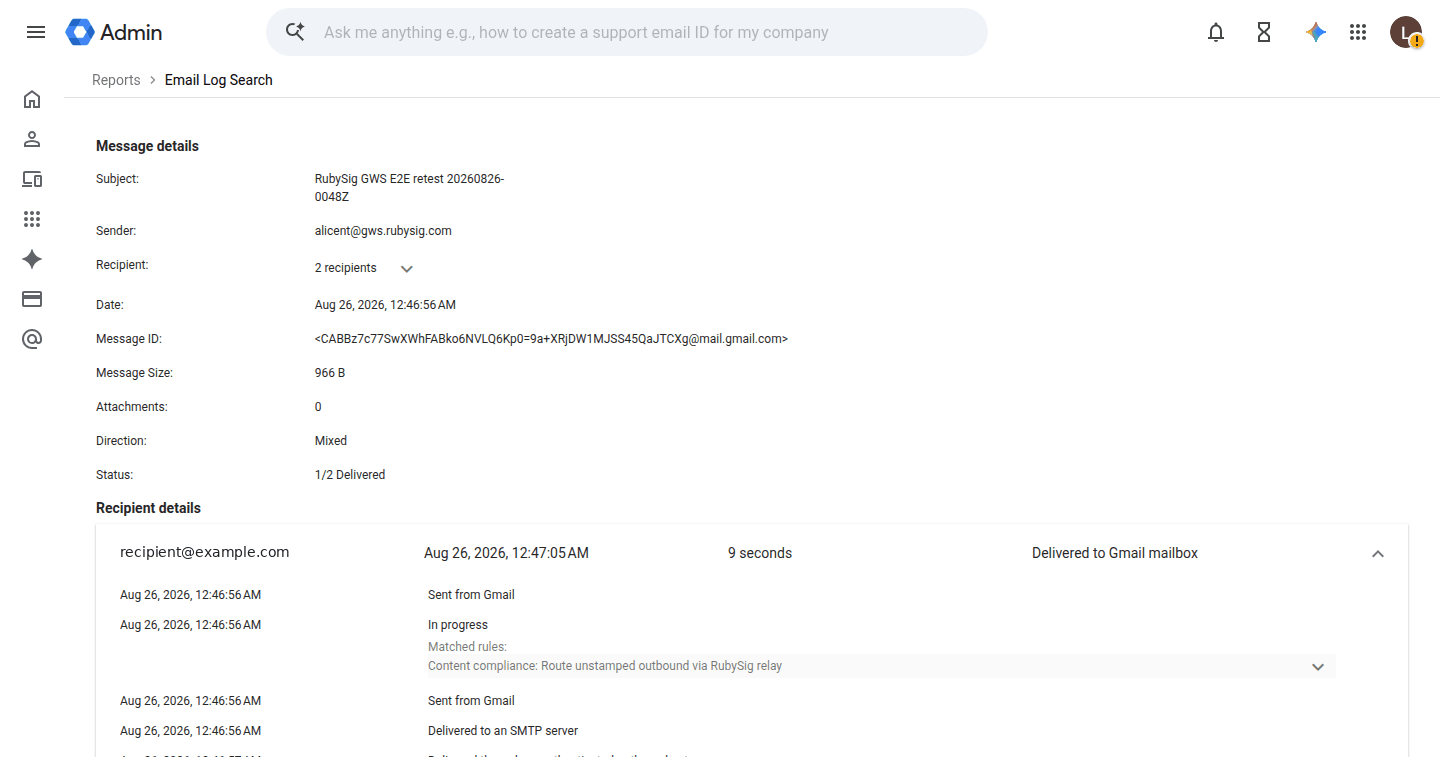
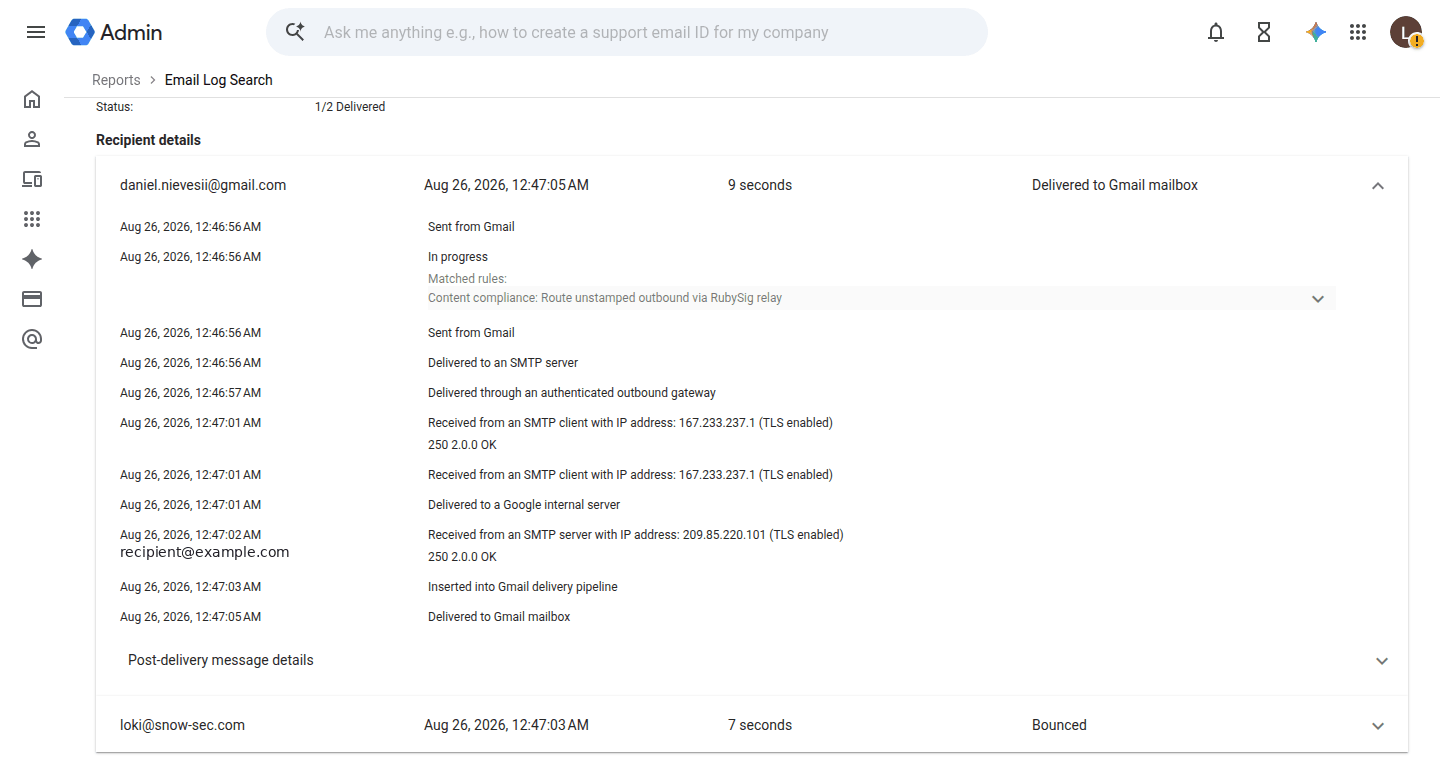
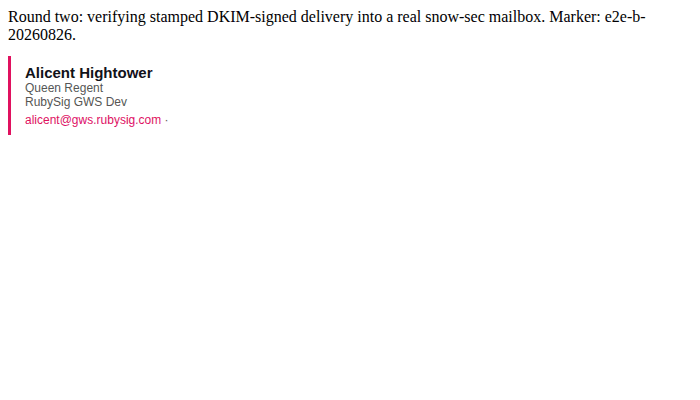
In the received message, view the headers (Gmail: ⋮ → Show original) and look for X-RubySig-Stamped: yes and dkim=pass … header.s=rubysig1. And the signature itself:
Two things Google decides for you
- Mail to your own parent domain is not "outbound". If your Workspace tenant is a subdomain —
mail.example.com— Google does not treat messages toexample.comaddresses as outbound, so the compliance rule never fires and those messages are delivered unstamped. Mail to any other domain is unaffected. - Mail from devices and apps via the SMTP relay service is stamped too. A printer or application sending through
smtp-relay.gmail.comas one of your addresses takes the same outbound route as a user, so it gets the signature of the address it sends as.
What you have now
One route, one compliance rule, one relay rule. Outbound mail that has not yet been stamped goes to RubySig and comes back stamped and signed; everything else flows as before. To take RubySig out of the path, disable the content compliance rule.